Your first generation in two minutes
The short route from an empty studio to a finished image. No setup needed — the defaults are fine to start with.
Open the studio
Click "Studio" in the left menu or "Start creating" on the landing page. Pick a task — for example, "Create image".
Pick a model
The catalog has dozens of models. For your first run take a fast and cheap one: Z-Image for pictures, or Nano Banana if you want to edit a photo. Save the flagships like Flux 2 Pro and Seedance for later — they cost more.
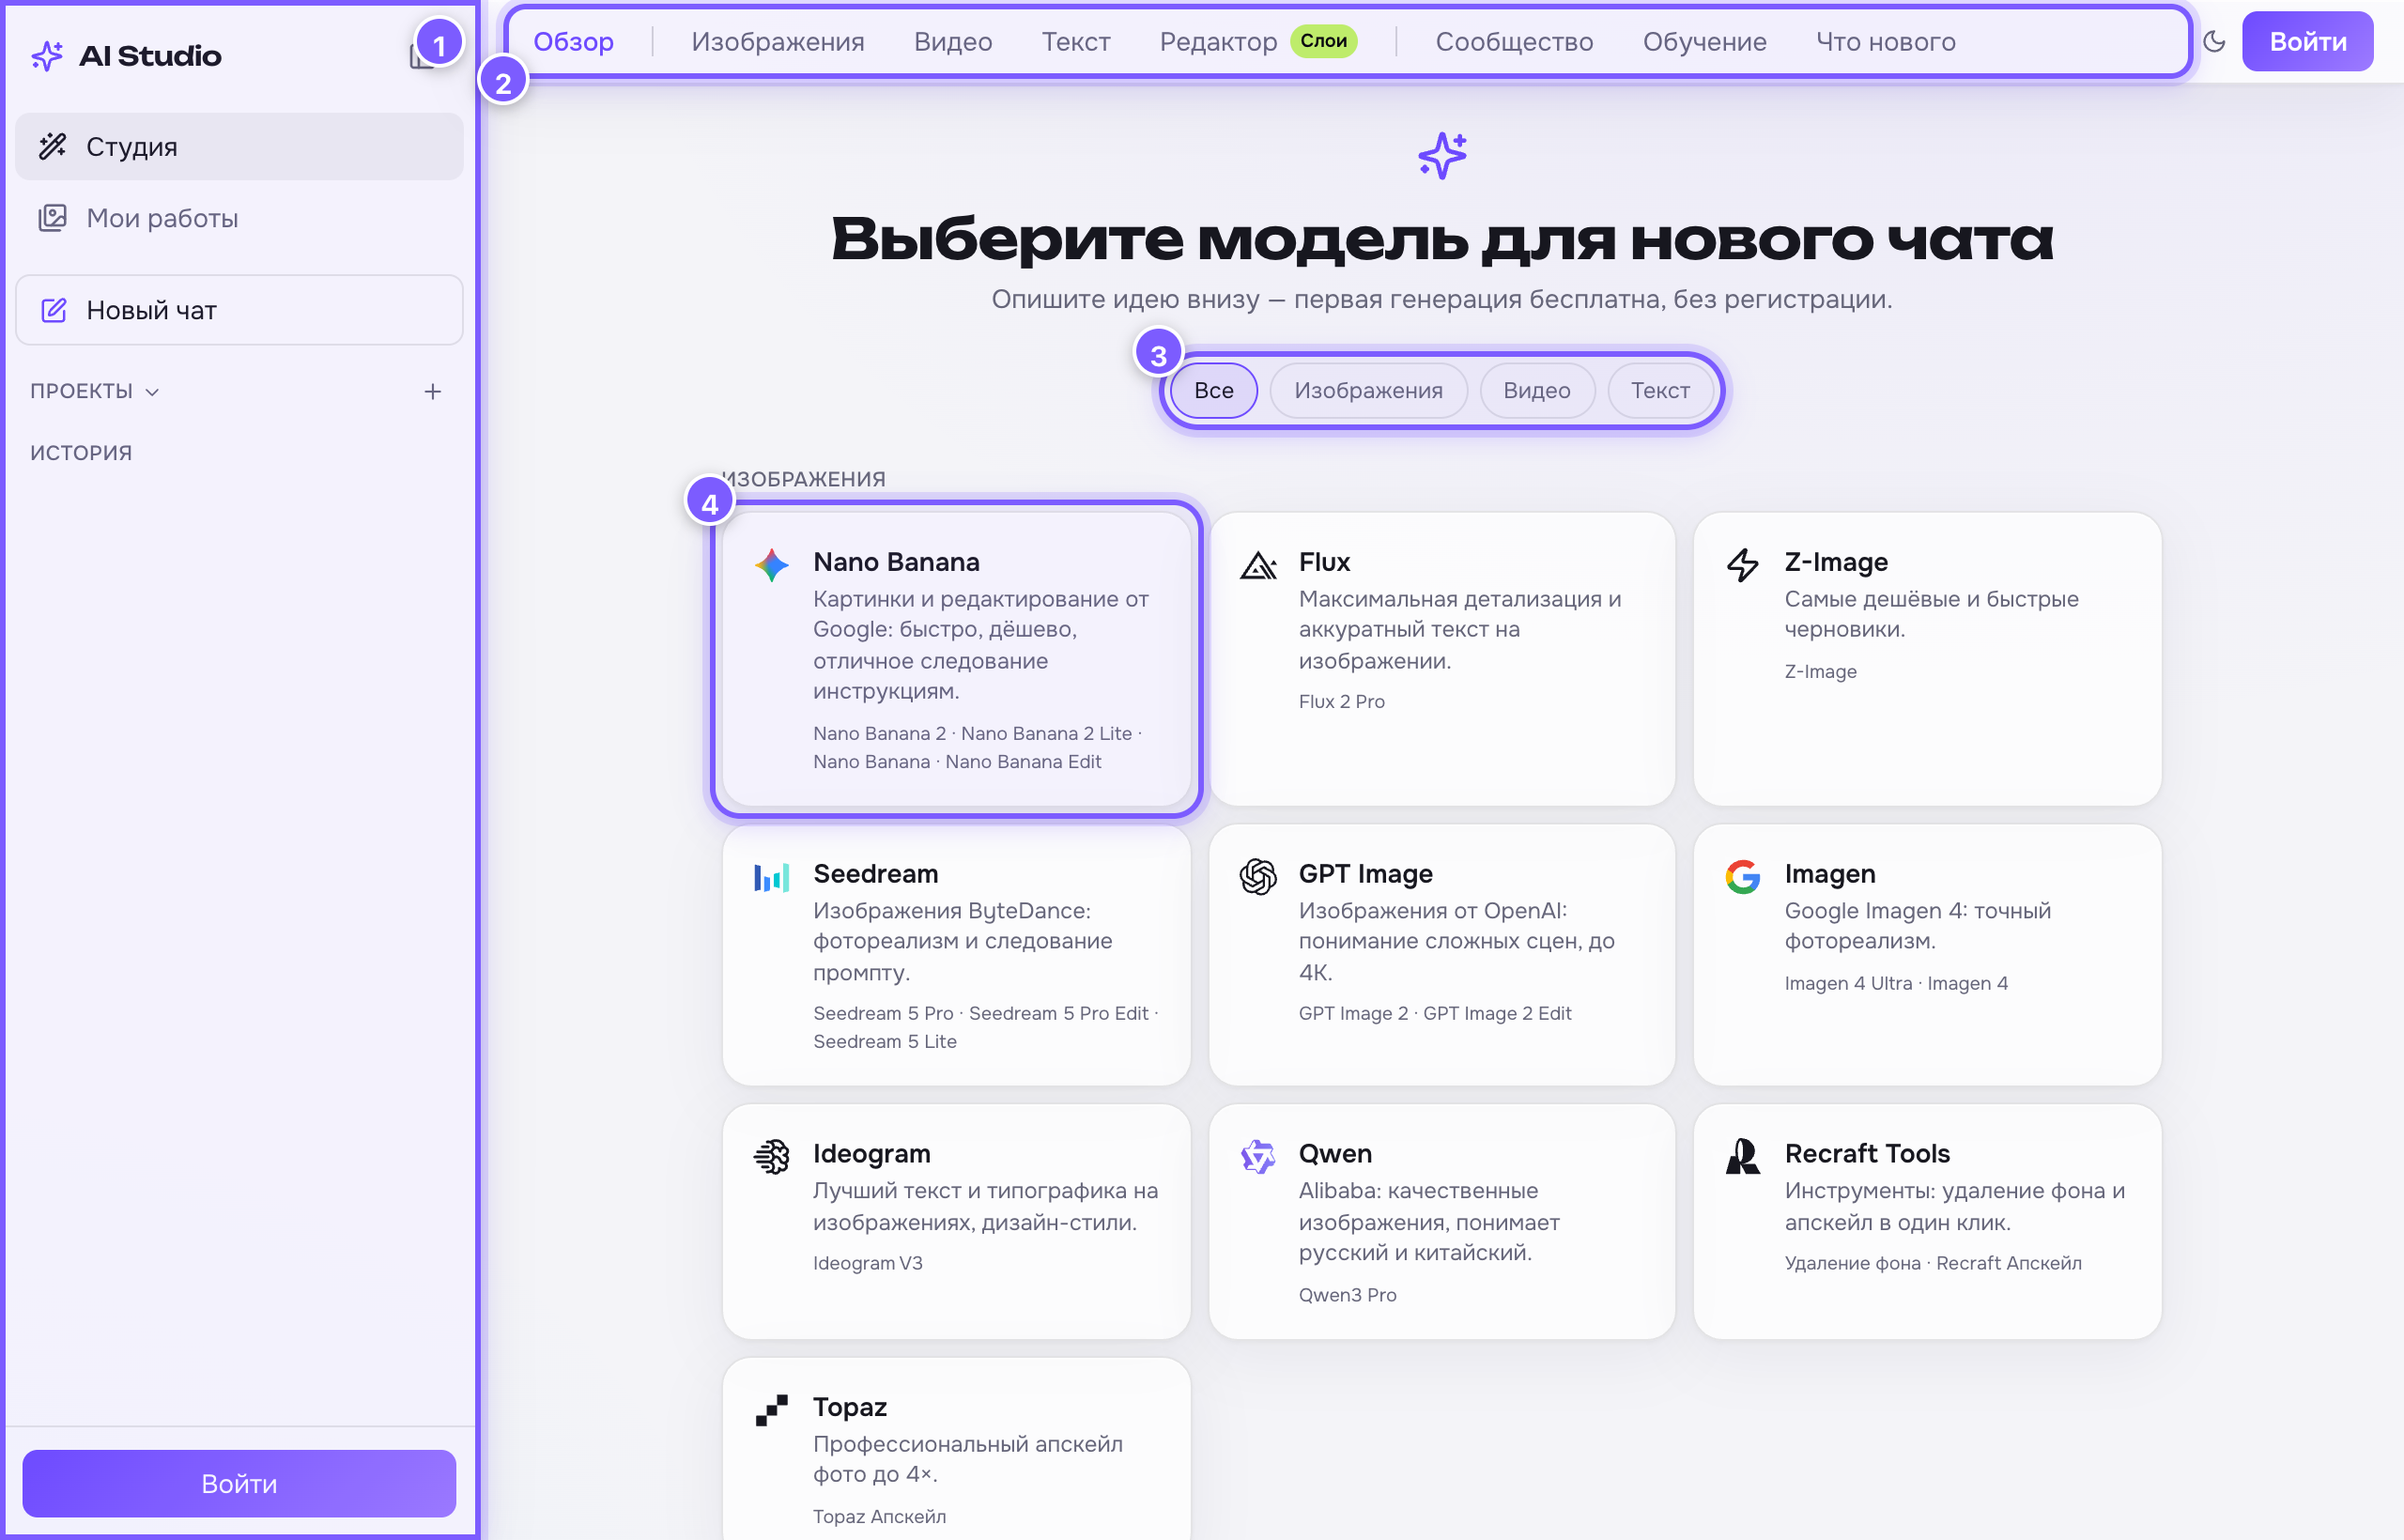
- Sidebar: Studio, My works, New chat.
- The top section menu.
- Filter: images, video or text.
- A family card — click to open a chat.
Describe what you want
Write a prompt: subject, environment, style, light. One phrase is enough to start — "a ginger cat sleeping on a windowsill, soft morning light, photorealism". See "What is a prompt" for the full breakdown.
Run it and wait
Press the generate button — the price in credits is shown right on it, and that is exactly what will be charged. The result appears in the feed: download it, publish it to the community, or refine it with another model.

- Prompt field. 2. Paperclip for your own photo. 3. The settings gear. 4. Chips for common settings. 5. Model version. 6. The run button — the price is written on it.
If you don't like the result
- Refine the prompt: add style, light, details.
- Generate again — every run gives a new variant.
- Switch models: each one has its own character and strengths.