How every editor works
Getting started3 min read
All AI Studio editors are built the same way: you set things up on the left, results appear on the right. Learn one — you know them all.
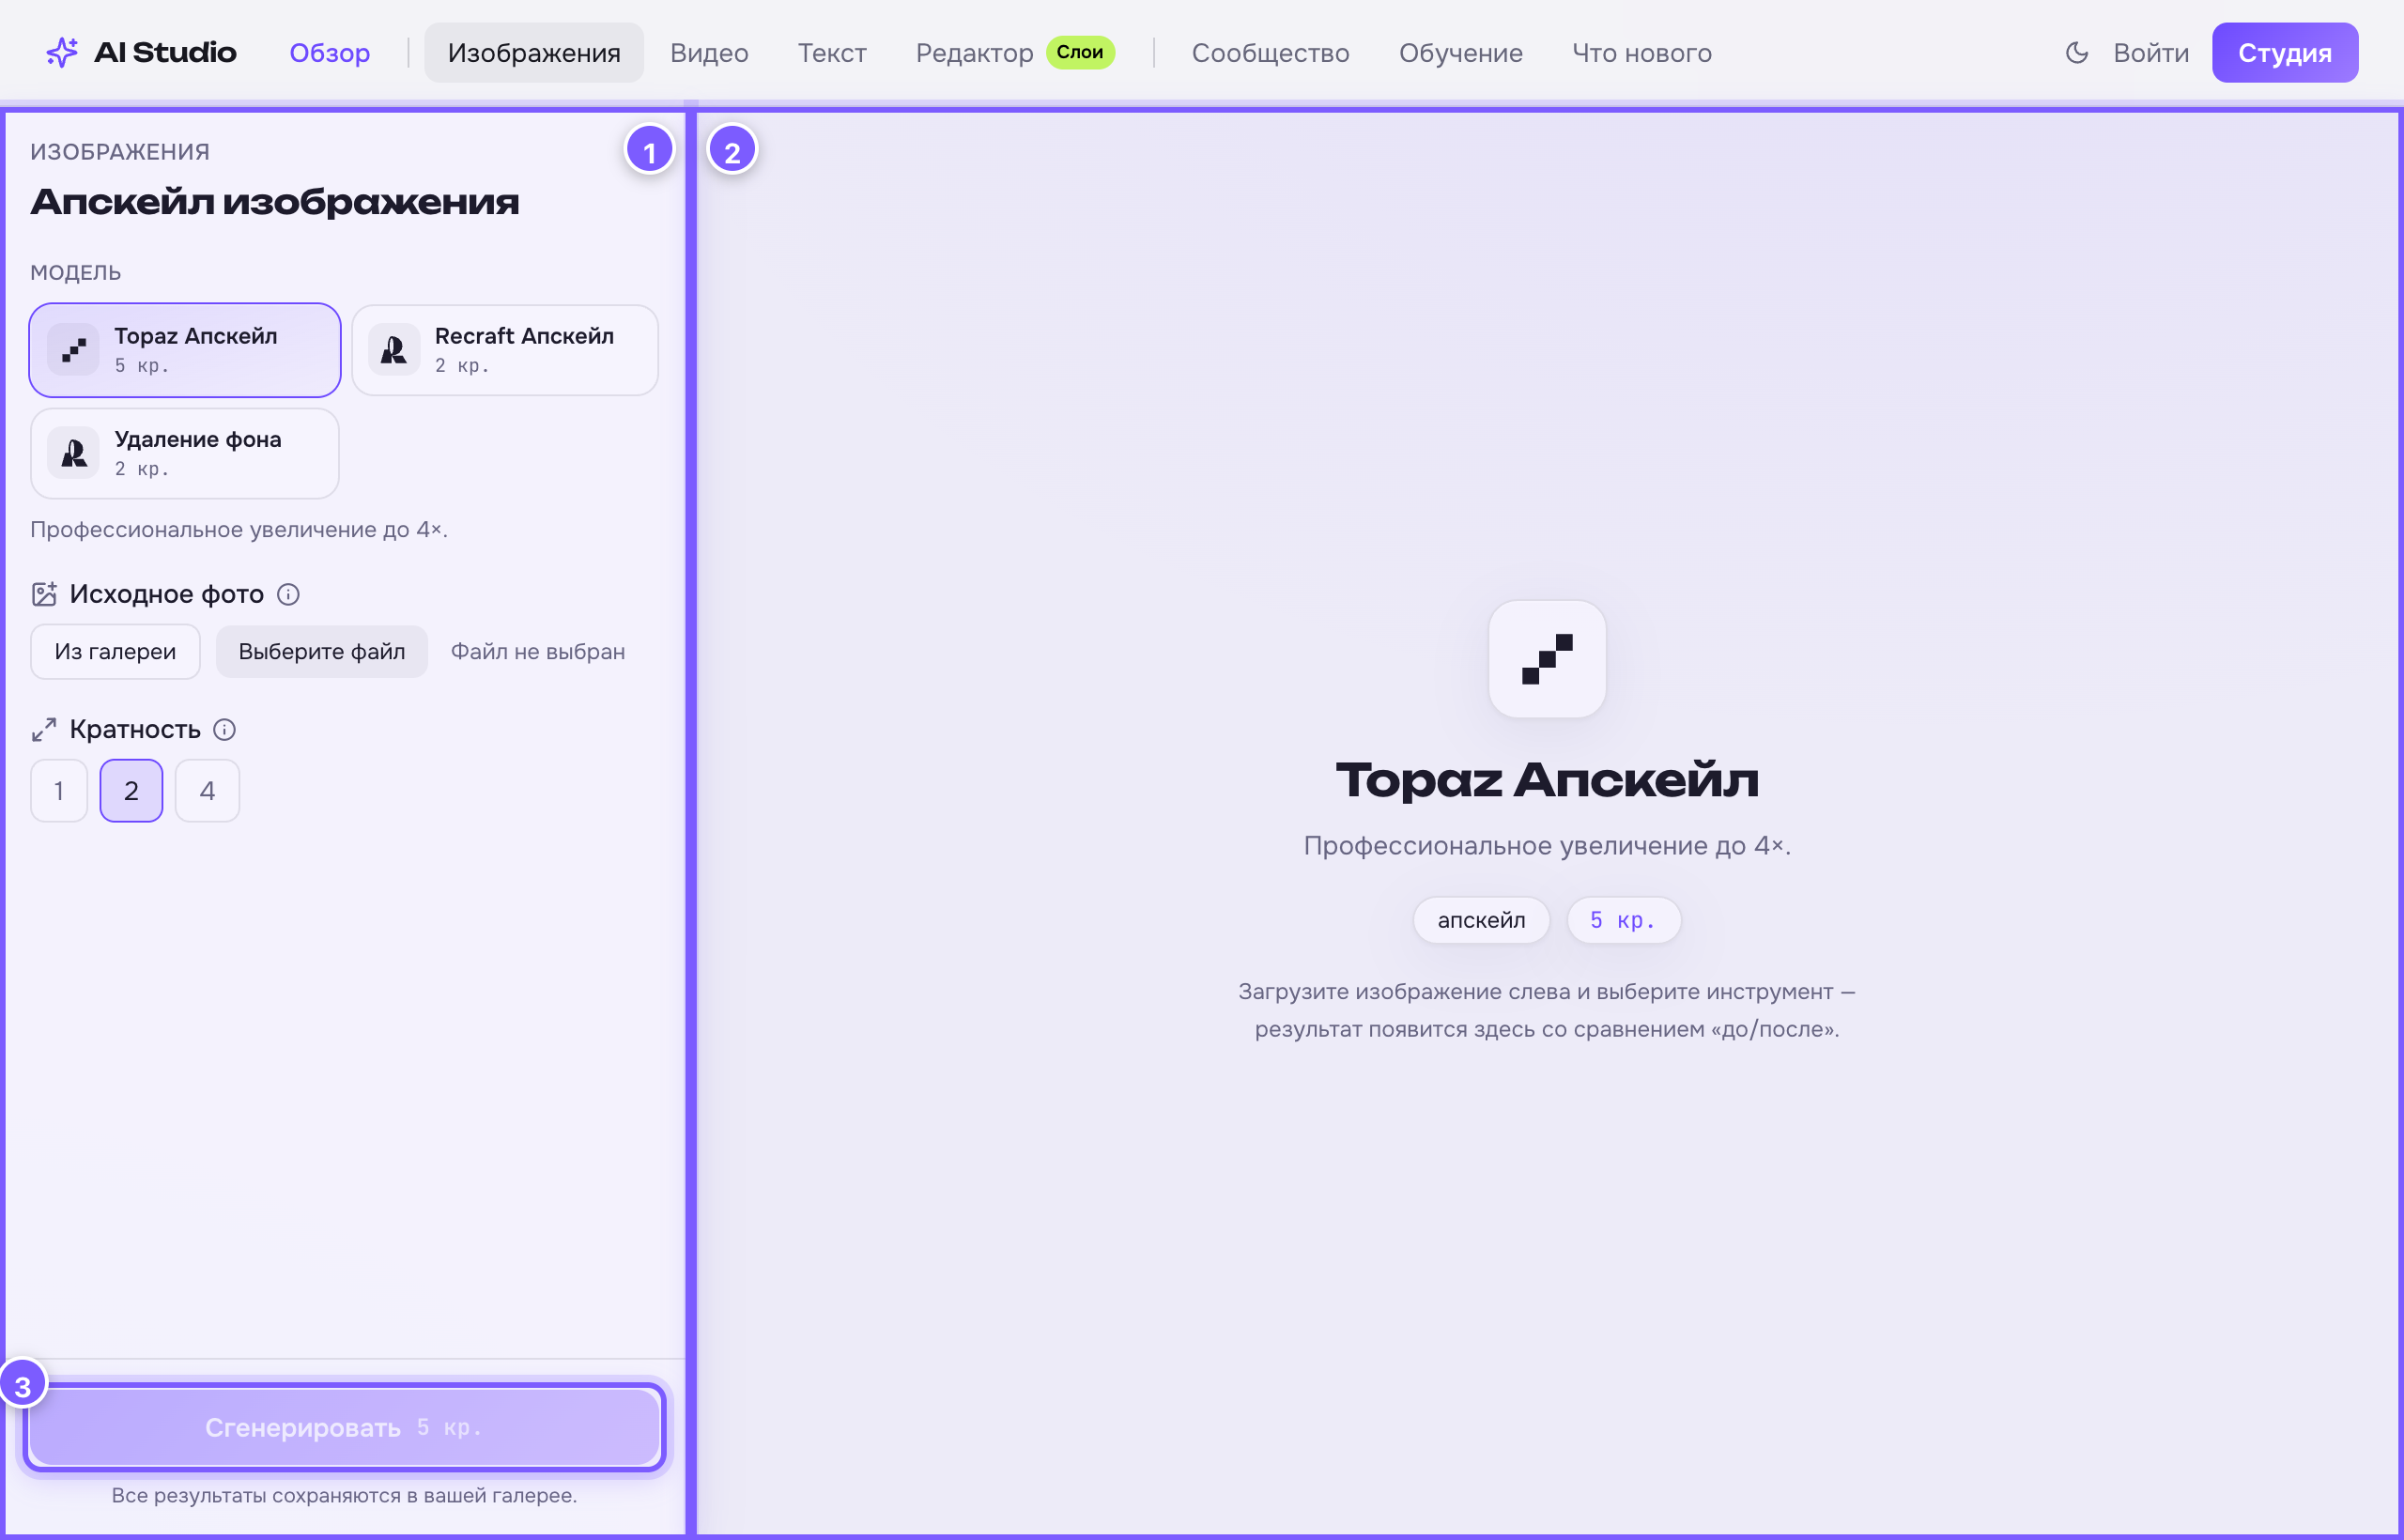
- Settings panel — on the left. Pick a model, upload a photo, tweak parameters.
- Results feed — on the right. While it is empty it shows a description of the selected model. After you hit generate, images and videos land here.
- Generate button — at the bottom of the panel. It shows the price in credits: that is what one run costs.
Which editor for which job
| Job | Editor |
|---|---|
| Make an image or video, or ask a text model | Studio |
| Fix part of a photo with a brush | Inpaint |
| Enlarge an image or cut out the background | Upscale |
| Change the light in a photo | Relight |
| Put in a different face | Face swap |
| Put in a different character | Character swap |
| A series of frames in one style | Photodump |
| Generate in the style of your own images | Soul Moodboard |
Step by step
- Pick a model in the MODEL block — each has its own price and character.
- Fill in what the editor asks for: text, a photo, or both.
- Press Generate and wait. Images usually take 10–40 seconds, video 1–5 minutes.
Good to know
- Button greyed out — something is missing, usually the text or an uploaded photo.
- The price is shown up front. It changes with your settings: longer video and higher resolution cost more.
- Everything is saved. Every result goes to "My works" automatically, even if you close the tab.
- Failed runs are refunded. If a generation fails, credits return to your balance automatically. See Generation failed.
The "i" next to a setting
Every setting has an i circle. Hover it for a short explanation and a Learn more link to the full article.
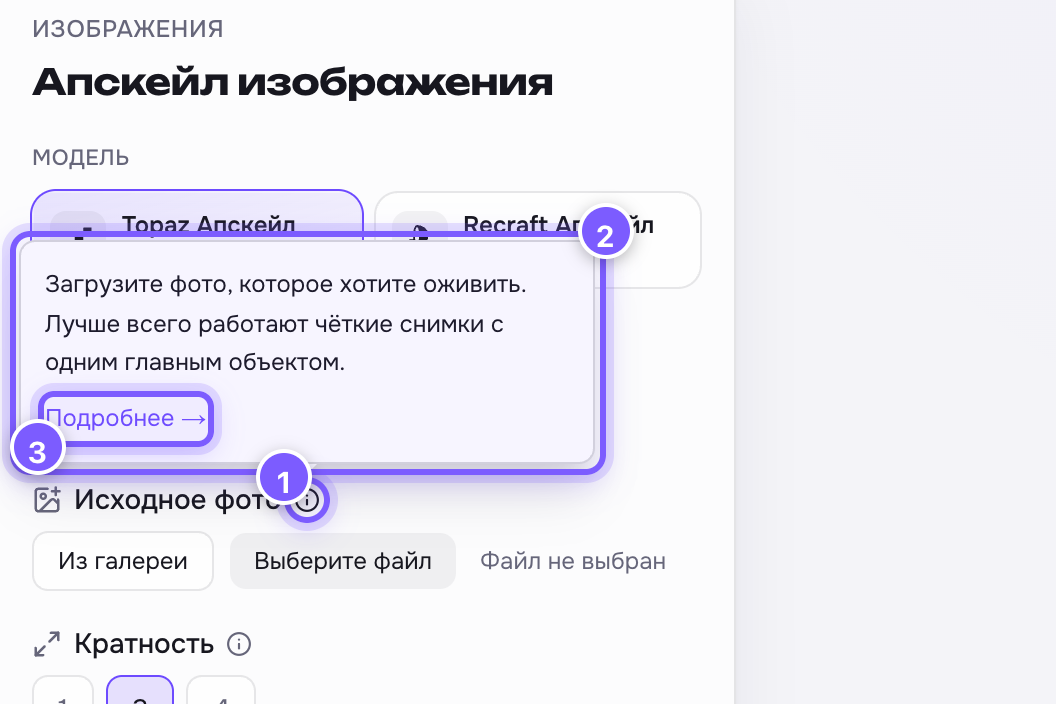
- The i circle — hover it.
- A one- or two-line explanation.
- Learn more → — opens the article on top of the editor, no need to navigate away.